One-Sheet-Wonder-Box
Samstag, 13. Dezember 2014
Hallo!
Heute zeige ich (Bianca) euch wie man aus nur einem Blatt Scrapbookingpapier eine tolle schnelle Box machen kann, die wirklich für jeden Anlass prima geeignet ist und aus jedem kleinen Geschenk etwas ganz Besonderes macht.
***
Hi!
Today it´s my (Bianca) turn to show you this little tutorial for making a quick little one-sheet-wonder-box. You can use it for really every occassion and it makes every little gift very special.

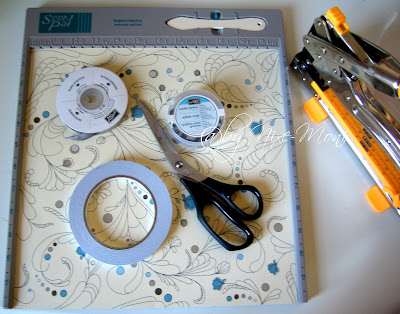
Hier ist erst mal eure Einkaufsliste:
* 1 Blatt Scrapbooking Papier 12x12inch (* 30,3 x 30,3cm) (nicht zu dünn, beidseitig oder einseitig bedruckt)
* 1 Band mind. 12" (*30cm) lang oder länger
* 4 Ösen und dazu passende Lochmaschine oder nur Lochmaschine
* Scoreboard + Falzbein oder Lineal und Bleistift
***
This is your shopping list:
* 1 sheet pattern paper 12x12" (*30,3 x 30,3cm) (heavy weight, printed at both sides ore just one side)
* 1 ribbon min. 12" (*30cm)
* 4 eyelets and tool for using them
* scoreboard + bonefolder, ruler and pencil

***
This is your shopping list:
* 1 sheet pattern paper 12x12" (*30,3 x 30,3cm) (heavy weight, printed at both sides ore just one side)
* 1 ribbon min. 12" (*30cm)
* 4 eyelets and tool for using them
* scoreboard + bonefolder, ruler and pencil
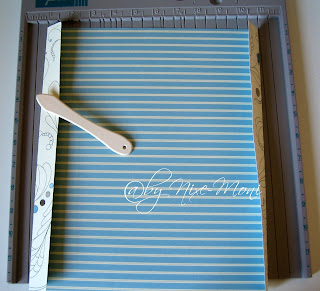
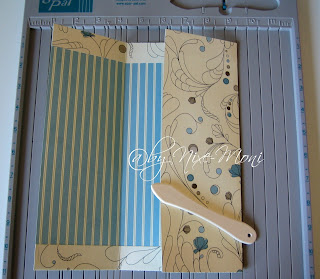
So, jetzt beginnt ihr erst einmal damit euch das 12x12" Papier auf 8,5" x 11" (*21,7 x 27,7cm) zurecht zu schneiden.
***
Now we can start with cutting the 12x12" paper into a 8,5" x 11" (*21,7 x 27,7cm) sheet.

Now we can start with cutting the 12x12" paper into a 8,5" x 11" (*21,7 x 27,7cm) sheet.
Dieses Stück können wir dann gleich falzen. Und zwar erst der Breite nach auf den Stellen wie am Foto (*6,2 x 4,9cm).
***
Score this sheet like it´s marked on the photos. We start at the 8,5" side of the paper.

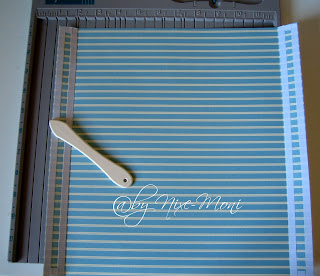
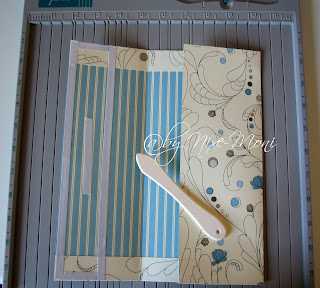
Dann drehr ihr das Blatt und falzt noch einmal wie am Foto beschriftet (* 11,2 x 16,3cm).
***
Then score the 11" side like it´s marked.

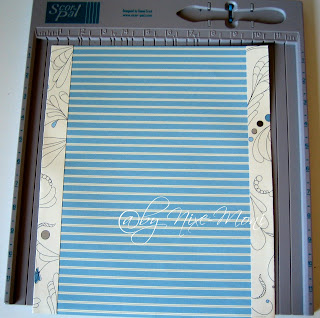
Danach sollte euer Blatt so aussehen.
***
Now your sheet looks like this.

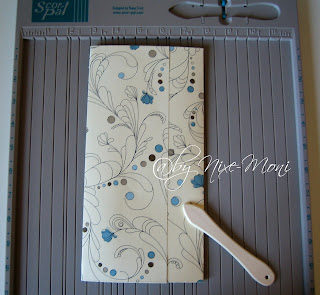
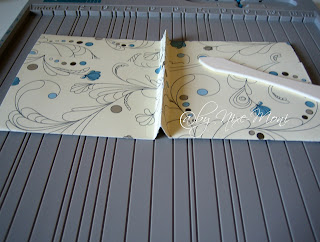
Hier kommt jetzt die einzige Stelle an dieser Box, die ein bisschen knifflig ist. Denn jetzt müssen wir die Seitenteile falzen und dann zurecht knicken, so wie ihr es am Foto sehen könnt. Diese Linie verläuft schräg, deswegen kann sie nicht mit dem Falzbrett gefalzt werden.
***
Now we start with the little tricky part of the box. We need a score line diagonal to the other lines so we can´t use the scorebord for it.

Am Foto seht ihr zwei Punkte. Verbindet die beiden Punkte so mit einander, dass die bereits gefalzten Außenlinien gerade übereinander liegen.
***
You can see two blue dots on the photo. Fold the paper so that the dots will touch and the "old" scoreline will lay straight on the other one.

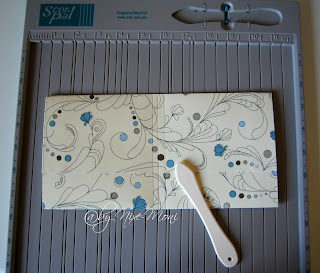
Dadurch entsteht automatisch die benötigte Falzlinie die schräg zu den anderen Linien verläuft.
***
This way the new diagonal scoreline will be build.

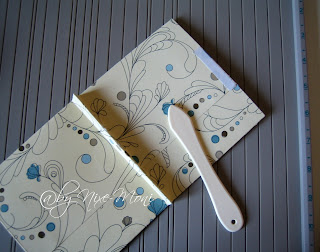
Wenn ihr es richtig gemacht habt dann sieht das nachher so aus. Die neue Falzlinie verläuft schräg zu den geraden Falzlinien.
***
If you made it correctly it looks like on the photo. The new scoreline is diagonal to the old one.

***
Score it careful and do the same on all 4 corners of your box bottom. Now your sheet looks like this.

Wenn ihr wollt könnt ihr die beiden Laschen, die sich oben auf beiden Seitenteilen ergeben, mit einem Tropfen Klebstoff ankleben. Das macht das Anbringen der Ösen nachher leichter. Es funktioniert aber auch ohne Klebstoff. Bei den grünen Punkten je einen Tropfen Kleber anbringen.
***
If you like it you can now use a little bit of glue to fix the layers. It´s not really necessary but it will help you to use your eyelets later. Just two little glue dots like it´s marked on the photo.

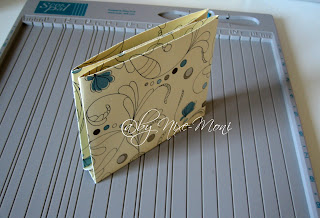
Das sieht dann so aus.
***
Now it looks like this.

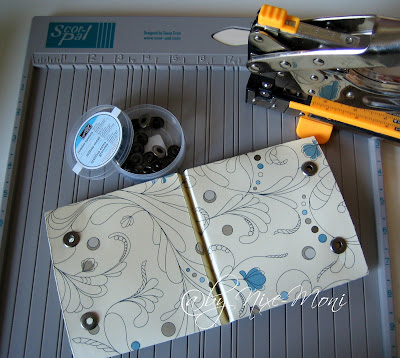
Markiert euch nun die Stellen an denen ihr die Ösen anbringen wollt und macht durch beide Papierschichten hindurch ein Loch. Hier kommen die Ösen hinein. Wenn ihr keine Ösen habt dann tun es auch die Löcher. Das Papier ist mit seinen Lagen dick genug dafür!
***
Mark the positions for the holes and punch them through all layers of your box. Than add your eylet and repeat 4 times.

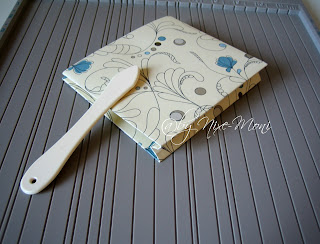
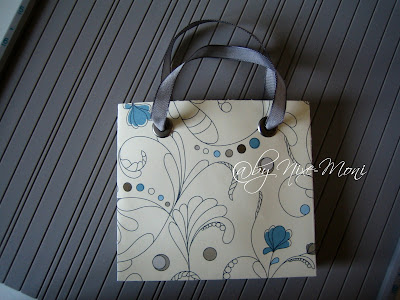
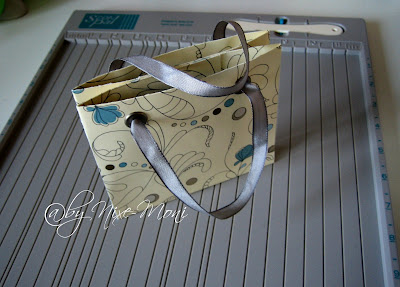
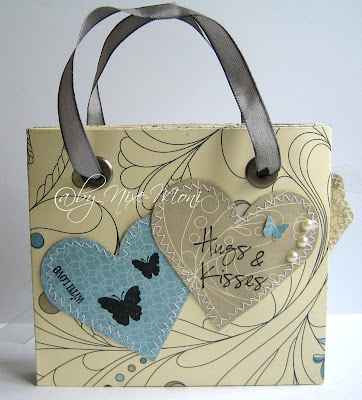
Und schon könnt ihr eure One-Sheet-Wonder-Box nach Herzenslust dekorieren. Besonders schön sieht es aus wenn man an der oberen Kante noch eine Spitze oder eine gestanzte Borte anbringt.
***
The one-sheet-wonder-box is now ready to decorate as you like it. It´s especially lovely if you use a border punch or lace on the upper end of your box.

Am Schluss braucht man die One-Sheet-Wonder-Box nur noch zubinden.
***
In the end just close the box with the ribbon.
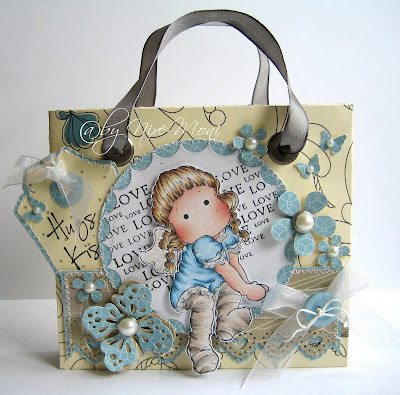
Hier sind auch schon die One-Sheet-Wonder-Boxen unseres Teams:
***
These are the one-sheet-wonder-Boxes from our team: