Hallo Ihr Lieben,
es ist endlich wieder Samstag und deshalb gibt es auch heute wieder eine neue Ausgabe vom Stempeleinmaleins. Diesmal möchte ich Euch zeigen, wie man einen Cardfolder gestaltet. Es ist wirklich nicht schwer ihn nachzuarbeiten und man kann ihn für vieles mehr, als nur für Abdrücke verwenden. Man kann ihn z.B. auch als Aufbewahrungstasche für Embellishments verwenden oder aber auch für ATC´s ist er perfekt. Ich habe im Moment meine Halbperlen darin aufbewahrt, jetzt muss ich sie nicht mehr so oft suchen ;o)
***
Hello dear all,
it´s finally Saturday again and time for another issue of Stempeleinmaleins. This time I would like to show you a tutorial how you can create a Cardfolder. It´s really easily to work out such a folder and you do not have to use it only for stamped images. For example, you also can put embellishments or ATC´s in it. I was always searching where my halfpearls are, but now I have a wonderful place for it, because I keep them in my folder, now I´m searching no longer ;o)
Nun geht es aber los ...
***
Now let´s get started ...
***
The dimensions of the cardfolder after finishing is 4,5" x 8".
Ihr benötigt folgende Materialien:
- Scor-Pal Board
- einen Bogen Cardstock 8" x 12" (ca. 20,5 x 30,5 cm)
- einen Bogen Cardstock 3" x 10" ( ca. 7,5 x 25,5 cm)
- doppelseitiges Klebeband
- Schere oder Schneidemaschine
- Klettband oder Magnetverschluß
***
What you need:
- Scor-Pal Board
- one peace of cardstock 8" x 12"
- one peace of cardstock 3" x 10"
- double faced adhesive tape
- cutter
- hook and loop tape

Als erstes schneidet Ihr ein Stück Cardstock auf die Größe von 8" x 12" (ca. 20,5 x 30,5 cm) zu.
***
At first cut a piece of cardstock at the size of 8" x 12".

Nun wird der Cardstock an den oberen Rand des Scor-Pals gelegt. Ziehe je einen Strich bei 3" + bei 3,5", danach noch bei 8" + 8,5 ".
***
Now line your cardstock up on the top of your Scor-Pal and score it at 3" + 3,5" also on 8" + 8,5".

Danach muss der Cardstock an den Kerben entsprechend gefaltet werden.
***
After this fold the cardstock at the scored lines.

Jetzt wird der Cardstock für die Seitenteile zugeschnitten. Die Maße betragen 3" x 10" ( ca. 7,5 x 25,5 cm).
***
Now cut the cardstock for the side parts of the size 3" x 10".

Nun ziehe wieder mit dem Falzbein entsprechende Striche in 0,5" Schritten.
***
Now score again with the bone folder at each 0,5".

Hälfte den Cardstock in der Mitte und falte ihn wie eine Zieharmonika.
***
Cut the cardstock in the half and fold it like a accordion.

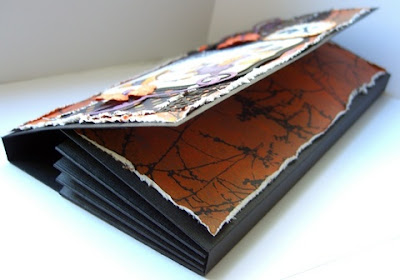
Nun ist es fast geschafft ... Die Seitenteile werden jeweils links und rechts in den Cardfolder geklebt. Dafür an den Seitenteilen außen, jeweils doppelseitiges Klebeband anbringen.
***
At this point you have almost managed it ... now stuck the side parts to the left and the right side into the Cardfolder. On the left and also on the right side of the side parts, you have to stuck double faced adhesive tape.

Nachdem die Seitenteile innen angeklebt wurden, ist der Folder fast fertig.
***
After sticking together the side parts into your folder, the folder is almost finished.

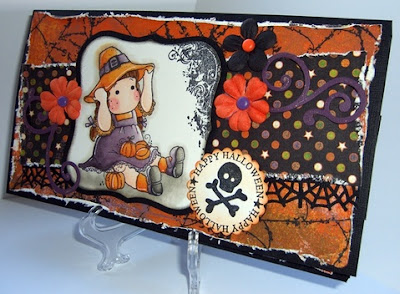
Nun muss nur noch das Cover, nach Belieben, gestaltet werden und dieses wird dann mit doppelseitigem Klebeband auf der Vorderseite angebracht. Da der untere Teil nicht ganz mit dem Cover bedeckt wird, habe ich ihn nochmal mit Cardstock, von innnen, verstärkt, damit man beim Auf- und Zumachen das Papier nicht so verbiegt bzw. damit wird es noch etwas stabiler.
***
Now its time for you to create the cover and after this you have to glue it on the frontside with double faced adhesive tape. The lower part is not completely covered with the cover, so I have again boosted it inside with cardstock, so when you open and close it, the paper shout not bend and/or so it´s more stronger.

Damit man den Cardfolder auch auf- und zumachen kann, habe ich auf der Innenseite, in der Mitte, ein Stück Klettband angebracht.
***
So that you can open and close the cardfolder, I have put in the middle of the inside a piece hook and loop tape.


Hier seht Ihr nochmal zwei Ansichten, wo man schön sehen kann, dass das Cover nicht ganz den Cardstock bedeckt und ich ihn deshalb, im unteren Teil, verstärkt habe.
***
Here you can see another two views, because the cover is not covering the cardstock, so I boosted the lower part.


Ich empfehle die Rückseite nach Belieben zu verstärken. Entweder nochmal mit etwas Cardstock, in einer anderen Farbe, passend absetzen oder auch verzieren, da der Cardstock nicht ganz so stabil ist wie fester Tonkarton.
***
I recommend to boost the backside too. Either with some cardstock in another colour or created with embellishments, because the cardstock is not strong enough.

Fertig ist der Cardfolder, wo viele Stempelabdrücke Platz finden :o)
***
Now your cardfolder is finished and you can put many stamped images in it :o)

Ich hoffe Euch gefällt meine Anleitung und wünsche Euch noch ein tolles Wochenende.
***
I hope you like my tutorial and I wish you a wonderful weekend.
Hugs
Nixe-Moni 
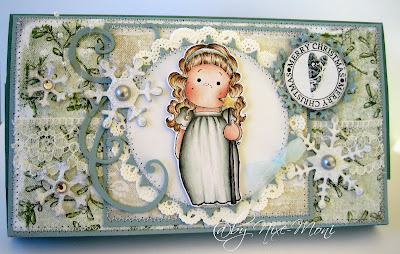
Hier seht Ihr noch zwei Beispiele von mir:
***
Here are another two examples of me:

&


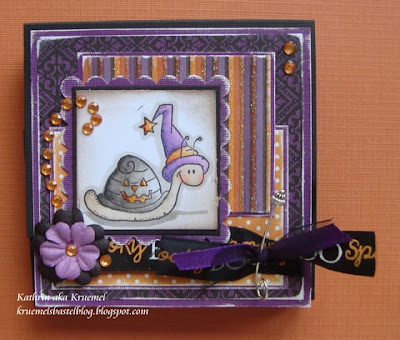
Und hier kommen noch die Inspirationen vom Design Team:
...
And here are the inspirations from the design team:.


10 Kommentare:
Das ist eine super Anleitung, danke schön.
das ist ja suuuper genial.. danke..
LG, Katrin
super Anleitung, muss ich gleich mal ausprobieren. auch schöne Werke vom DT. Lg Mausel
Wow ist das toll. Vielen lieben Dank für diese tolle Anleitung.
LG Gundi
Tolles Tutorial. Ich habe mein Cardfolder soeben fertig gestellt.
Vielen lieben Dank für´s zeigen. Schön beschrieben.
Hallo, kann mir mal jemand die Inchangaben in Centimeter übersetzten? Besitze leider kein ScorPal und würde meinen Cardfolder doch ganz gern beenden :) LG Mausel
Danke für die tolle Anleitung!
Solch einen Folder kann man immer brauchen! Ich bin Euch sehr dankbar für die Maße- das macht die Herstellung echt supereinfach!
@ Sonnenblume und Mausel: ein Inch ist ca 2,5 cm! Ich habe mir da ein Schullineal gekauft- da ist beides drauf.
Liebe Grüße
ILo
super tuto
bravo md
Danke für das tolle Tutorial!
Ich musste diese schicken Cardfolder gleich nachbasteln!
Hallo,
ich danke euch auch. Es geht doch sehr einfach. Ich habe mich heute auch daran versucht: KLICK
LG Cinni
Kommentar veröffentlichen