


Box in Buchform
Samstag, 4. Dezember 2010

Hallo an alle! Es ist wieder Samstag, morgen ist schon der zweite Advent - Weihnachten kommt! Viele Geschenke müssen noch gebastelt und verpackt werden - und ich möchte Euch heute eine Box zeigen, die schnell gemacht, an sich aber schon ein kleines Geschenk ist.
***
Hello to all! It´s another saturday, tomorrow is the 2nd sunday in advent - christmas comes closer and closer each day! There are so many gifts left to craft and wrap - and I´d like to show you a little box today that is made quickly but is a little gift on itself.
Ihr braucht:
1 Bogen Cardstock, 12" x 12"
doppelseitiges Klebeband
Schere und Cutter
Falzbein
Lineal
***
You need
1 sheet cardstock, 12" x 12"
doublesided tape
scissors and cutter
bonefolder
ruler
Die Vorlage für die Box besteht aus zwei Teilen. Bitte ladet Euch die beiden PDF-Dateien hier (Teil 1) und hier (Teil 2) herunter und druckt sie aus. Anschließend müßt Ihr die Vorlage zusammensetzen. Ein Teil der Vorlage ist auf beiden Ausdrucken zu sehen. Legt diese Teile paßgenau übereinander und klebt die Vorlage zusammen.
***
The template for the box is made from 2 pieces. Please download both pdf from here (part 1) and here (part 2) and print them with your home printer. Then you need to put the template together. You´ll see that a part of the template is printed on both of the pages. Put those on top of each other and fix the pages together.
Nun könnt Ihr die Vorlage auf Euren Cardstock übertragen. Bitte benutzt hierfür keinen schwarzen Filzstift wie ich hier in der Anleitung - dies habe ich nur getan, um Euch die einzelnen Schritte besser zeigen zu können.
***
Now you can transfer the template to your cardstock. Please don´t make the lines with a black marker like I did - I only did it wo make it easier for you to see the single steps.

Schneidet nun die Form Eurer Box entlang der durchgezogenen Linien aus. Die schraffierten Teile schneidet Ihr heraus.
***Cut out the shape on the outer lines (the broken lines are for folding). Cut out the shaded areas.

Falzt als nächstes mit dem Falzbein und dem Lineal die unterbrochenen Linien. Knickt anschließend das Papier an den Falzungen vor.
***
Use your bonefolder and ruler to score the broken lines. Then fold the paper following the scored lines.

Dreht das Papier um (Innenseite nach unten) und befestigt auf den beiden Klebelaschen je ein Stück doppelseitiges Klebeband (meines hatte blöderweise eine weiße Schutzfolie, aber ich habe sie mit "Klebeband" beschriftet).
***
Turn your paper upside down (inside facing the table) and put some sticky strip to the both areas on the bottom of your template (unfortunately mine had a white backing but I wrote "Klebeband" on it to make it easier for you to see it).

Als nächstes klebt Ihr die Box zusammen. (Ich habe ab hier das Papier gewechselt, da ich auf meiner fertigen Box die schwarzen Linien nicht haben wollte.)
***
Now you can put the box together. (I changed the paper here since I didn´t want the black lines to appear on my finished box.)

Nun könnt Ihr die Box schließen - die beiden Teile innerhalb der Aussparung oben und unten klappen an den schrägen Falzlinien nach innen in die Box, der Streifen in der Mitte klappt nach innen zwischen die beiden Boxenteile.
***
Now you can close the box. The areas with the slanted scoring lines will fold inside the boxes, the middle strip will fold in half and go flat between the both box parts to the left and right.


Alles was Ihr jetzt noch tun müßt ist, die Box zu verzieren.
***
All you need to do now is finishing your box with some decoration and an image.


Bevor ich Euch jetzt noch die tollen Boxen vom Rest des Teams zeige, wünsche ich Euch viel Spaß beim Nachbasteln - und allen natürlich einen wundervollen und gemütlichen 2. Advent und volle Nikolaus-Stiefel!
***
Before I am going to show you the amazing boxes the rest of the team made I´m wishing all of you lots of fun trying one of these boxes - and of course to all of you a wonderful 2nd sunday in advent!
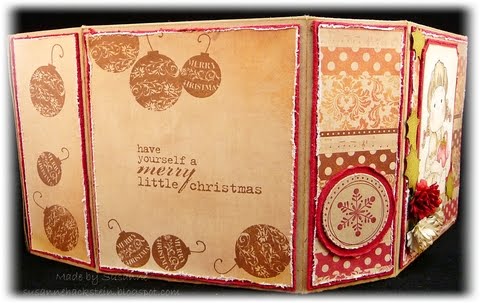
Tanjas Buchbox:


Susannes Box:


12 Kommentare:
Klasse Idee! Danke
Janna
Das ist ja mal ne geniaaaaaaaaaaaaale Idee ... das bringt mich doch glatt auf eine Idee ...
Ich danke Euch recht herzlich für diese Anleitung ...
Einfach TOLL!!!
LG, BastlWastl
C'est mignon comme tout et original. Bravoooo
Fantastisch! Ich find das so was von genial!
Danke für die Anleitung!
Fantastic box.
Amazing colouring, love these colours combo, give such a rich look of your project.
Tolle Anleitung, tolle Karte und tolle samples.
This is so beautiful!
Like it!
Hugs Susy
Just a quick note to let you know that a link to this post will be placed on CraftCrave today [05 Dec 01:00am GMT]. Thanks, Maria
This is a wonderful tutorial. The box reminds me of the Lifesaver candy boxes I used to get as a child for Christmas every year. FUN!!!
Kerry
Thank you so much for this post. I want to let you know that I posted a link to your blog in Creative Busy Hands Cricut Freebies Search List, under the Box, Purses, etc. post on Dec. 07, 2010. Thanks again.
Nochmals vielen Dank für die Anleitung, sie war bei der Umsetzung sehr verständlich und gut gemacht.
Ich habe sie in der Größe etwas angepasst, damit ich etwas größeres darin verstauen kann ... wenn ihr Lust habt und mal schauen wollt, hier ist meine Variante:
http://bastlwastl.blogspot.com/2010/12/challenge-16-bei-cards-und-more.html
Viele Grüße, BastlWastl
Thanks so much for this wonderful tutorial. I used it to make a box of small gift cards for an older friend. She just loved it. I will be posting my Book Box on Monday 2nd January as my DT Project at Unstampabelles with a link back to your tutorial. http://unstampabelleschallenges.blogspot.com/
Kommentar veröffentlichen