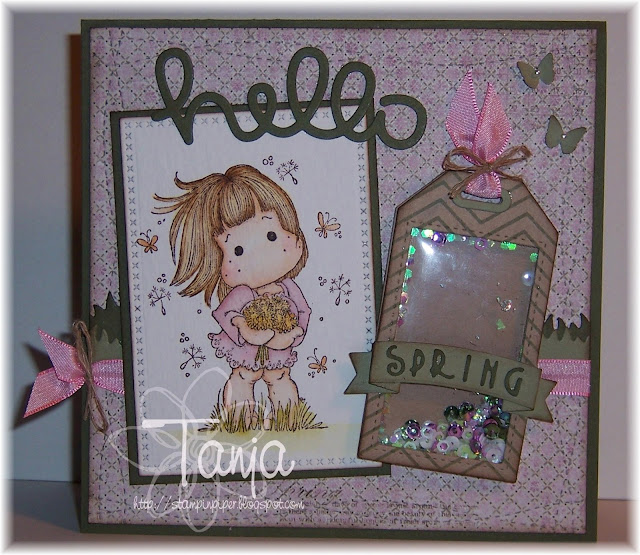
SEME Challenge #74 - Sketch

Samstag, 26. März 2016


Dieser Post enthält Werbung für den JL-Creativshop.


Da sind wir wieder mit einer neuen Stempeleinmaleins Challenge. Vielen Dank an alle Teilnehmer unserer 73. Challenge. Wir freuen uns sehr, dass ihr mitgemacht habt!

Bevor wir mit der neuen Challenge starten, möchtet ihr bestimmt wissen, wer die Gewinnerin der letzten Challenge und somit des 10,00 Euro Gutscheins von embellishments.de ist. Wir gratulieren Nicole G. ganz herzlich! Bitte schicke uns eine E-Mail mit deiner Adresse.


Dieses Mal verlosen wir das brandneue "Pretty Pink Pack" vom JL-Creativshop im Wert von ca. 36,00 Euro unter allen Teilnehmern dieser Challenge, das uns Jessica netterweise zur Verfügung stellt.

Ihr dürft den Sketch nach euren Vorstellungen abändern, aber man muss erkennen können, dass er die Grundlage für euer Projekt ist.

Euer fertiges Werk stellt ihr bitte auf eurem Blog oder in eure Onlinegalerie ein und verlinkt das Posting mit eurer Karte in der InLinkz Liste ganz unten. Der Gewinner wird am Ende mit random.org ermittelt.

An der Verlosung teilnehmen könnt ihr bis zum 29.04.2016 um 22:00 Uhr!

Und hier sind die Inspirationen vom Team:

Kathrin


Bianca


Nela


Clarissa


Flati


Tanja


Jay Jay


***

Read more...

Ü-Ei-Box - surprise egg box

Samstag, 19. März 2016


Hallo Stempelfreunde!
Es geht mit großen Schritten auf Ostern zu - wieder so ein Fest, zu dem man toll Kleinigkeiten verschenken kann. Aber schön verpackt sollen sie sein. Und da sich an Ostern ja alles um Hasen und Eier dreht, habe ich heute eine Idee, wir Ihr ein Ü-Ei schön verpacken könnt.
***
Hello dear stampers!
We're close to easter - one of these holidays you can give little pressies to friends and co-workers. But of course we want them to be wrapped nicely. And since easter is all about bunnies and eggs I have a tutorial for a box in which fits a surprise egg.

Ihr braucht:
1 x Cardstock 15,2 x 28,2 cm
2 x Cardstock 15 x 12
Schere, Kleber, Falzbein, Cutter
Designpapier
***
You'll need:
1 x cardstock 15,2 x 28,2 cm
2 x cardstock 15 x 12
scissors, glue, bonefolder, paper cutter

Auch diesmal habe ich wieder eine Schneiddatei für alle Cameo-Nutzer erstellt. Ihr könnt sie HIER runterladen. Für alle, die "mit der Hand" schneiden gibt es HIER ein PDF, das Ihr für den Ausschnitt in der Box benötigt.
***
Also for this box I made a cutting file for all the Cameo users amongst you. You can download it HERE. And for all the "traditional" crafters there is a PDF to download HERE that you'll need to know how to make the cut out in the box.

Falzt das große Stück Cardstock an der langen Seite bei 1 cm, 6,2 cm, 13,3 cm, 15,9 cm, 18,5 cm und 25,6 cm.
***
Score the long side of the big piece of cardstock  at 1 cm, 6,2 cm, 13,3 cm, 15,9 cm, 18,5 cm and 25,6 cm.

Dreht den Cardstock dann um 90° und falzt die kurze Seite bei 2,6 cm und 16,2 cm.
***
Then turn it around 90° and score the short side at 2,6 and 16,2 cm.

Schneidet es dann wie auf dem Bild zu sehen zu. Schneidet dabei vor dem 1cm-Falz eine kleine Lasche mittig.
***
Now cut as shown on the picture. At the 1 cm strip cut a little flap, about in the middle of the box.

Macht dann am letzten Falz einen Schnitt mit dem Cutter auf der Höhe auf der sich Eure Lasche befindet. Der Schnitt sollte etwas länger sein, als Eure Lasche hoch ist.
***
Cut a slit into the last scoring line where your flap is on the first strip. The slit should be a little longer than your flap's height.

Die beiden Cardstock-Stücke 12 x 15 cm werden an der langen Seite bei 2,5 und 12,5 cm gefalzt...
***
Both the cardstock pieces measuring 12 x 15 cm get scored at 2,5 cm and 12,5 cm at the long side...

...und an der kurzen bei 2,5 cm und 9,5 cm (oder auch rundherum bei 2,5 cm).
***
...and at 2,5 cm and 9,5 cm at the short side (or 2,5 cm on each side).

Schneidet die Stücke dann ebenfalls wie auf dem Foto zu sehen zu.
***
Then cut those pieces as shown on the picture.

Übertragt dann die Vorlage vom PDF auf diese Cardstockstücke. Wo genau, ist Euch überlassen. Wichtig ist aber, dass sie auf beiden Teilen an exakt derselben Stelle sind, sonst passt Euer Ü-Ei später nicht in die Box.
***
Then print out the PDF and copy the egg shape onto those two smaller pieces of cardstock. Where exactly is up to you but it is very important that both egg shapes are exactly at the same spot on both the cardstock pieces or your surprise egg won't fit in the box later.

Schneidet die Ei-Form aus dem Cardstock heraus.
***
Now cut out the eggs from the inserts.

Klebt dann das große Stück Cardstock zur Box. Es wird eine doppelte Box, wie eine doppelte Pizzaschachtel.
***
Glue together the big piece of cardstock building a double box, like a double pizza box.

Die beiden Einsätze mit dem ausgeschnittenen Ei werden dann in die beiden Seiten der Box gesteckt. Wenn Ihr möchtet, könnt Ihr sie mit etwas Kleber an der Box befestigen.
***
Put in the two inserts with the cut out egg shapes. If you want to you can add a bit of glue to the side flaps of the inserts to fix the inserts in the box.

Und nun geht es schon ans Dekorieren!
***
And now it's time to decorate your box!


Ich wünsche Euch viel Spaß beim Nachbasteln!
***
Now have fun making your own surprise egg box!

Und hier sind die Werke vom Rest des Teams:
***
And these are the boxes the rest of the team made:

Read more...

Kleine Geschenkbox - small gift box

Samstag, 12. März 2016

Juchu, es ist wieder Samstag und somit Zeit für eine neue Ausgabe vom Stempeleinmaleins. Heute haben wir Annika von FlebbeArt zu Gast und sie hat uns die Anleitung für eine Faltbox mitgebracht.
***
Yeah, it's Saturday again which means time for another issue of Stempeleinmaleins. Today Annika from FlebbeArt is our guest and she wrote a tutorial for a folded box.

So sieht sie fertig aus. Süß, hm?
***
This is the box. Cute, hm?

Hier sind die Maße für die einzelnen Boxteile. Für alle Silhouette Besitzer gibt es auch wieder eine Studio3 Schneidedatei.
***
Here are the dimensions for the single box parts. For all Silhouette users we also have a studio3 cutting file.

Ihr braucht: 
  • gemustertes Designpapier 19 x 5 cm
  • farblich passenden Cardstock 19 x 7 cm
  • Garn
  • ein Lochwerkzeug
  • doppelseitiges Klebeband

***
You need:
  • pattern paper 19 x 5 cm
  • matching cardstock 19 x 7 cm
  • ribbon
  • hole punch
  • doublesided tape


Das Papier laut Abbildung zuschneiden und falzen. Doppelseitiges Klebeband laut Abbildung anbringen und den Streifen des gemusterten Papiers quer auf den Boden des Cardstocks kleben.
***
Cut and fold the paper. Add doublesided tape as shown above and adhere the pattern paper's bottom onto the cardstock's bottom.

Nun die Seiten zu einer Box verkleben. Nochmal gut nachfalzen, die Box kommt so schon mal in die richtige 'Richtung'. Mit einer Lochzange laut Abbildung 4x lochen und abwechselnd von außen nach innen das Garn durch die Löcher führen.
***
Now glue the side parts together as a box. Score again to get the box it's shape. Add 4 holes like shown above and stick the ribbon through the holes like you can see on the picture.

Beim zusammenziehen und verknoten des Garns schließt sich die Box automatisch. Probiere Alternativen aus: Nicht nur in den Maßen sondern auch in der Lochung. Unten rechts habe ich z. B. nur 2x gelocht und auch 2 Stücke Garn benutzt um jede Seite separat zu verschließen.
***
The box is now closing itself if you pull and knot the ribbon. You can also try other sizes or punching. The right picture in the second row is showing a box with 2 holes and 2 ribbons to close each side seperately.

Oder ihr verwendet Eyelets und nur ein Stück Garn :)
***
Or you can add eyelets and one ribbon :)


Und hier sind die Geschenkboxen vom Team:
***
And here are the gift boxes from the team:


Read more...

Ostern in der Box - Easter in the box

Samstag, 5. März 2016


In drei Wochen ist Ostern und heute bauen wir uns Ostern in der Box, das etwas andere Osternest ...

    Und dafür braucht Ihr neben den üblichen Schneide- und Klebematerialien 
  • 6 Cardstockstreifen in 6cm x 8cm und diese PDF-Vorlage für Boden (2x) und Deckel
  • oder diese Cameo-Schneidedatei (für die kleine Variante wie meine schneidet ihr pro Seite einfach 3,5cm ab)
  • 6 Stücke Cardstock in 5,5 cm x 5,5 cm
  • ein Stück Cardstock geschnitten nach dieser PDF-Vorlage für das innere Körbchen
  • Papiere und Stempelmotive zum Verzieren
  • kleine Süßigkeiten
 ***

Only 3 weeks until Easter and we are building an Easter in the box today, a little different Easter basket. You'll need the usual tools for cutting, glue and

  • 6 pieces of cardstock 6cm x 8cm and this PDF file for bottom and lid
  • or this Cameo cutting file (if you want the small box like mine you have to cut 3,5cm from each flap)
  • 6 cardstock squares in 5,5 cm x 5,5 cm
  • 1 piece of cardstock cut like this PDF file for the inner basket
  • papers and stamped images for decoration
  • some sweets to fill in


Die 6 Cardstockstreifen falzt Ihr bei 2cm, so dass Ihr Seitenteile der Größe 6cm x 6cm habt und schneidet die untere Lasche ein, wie auf dem Bild zu sehen ist,
***
Score the 6 cardstock pieces at 2cm so you'll have the side parts in 6cm x 6cm, and cut the small part as shown on the picture,


die Ihr an eines der Sechsecke für den Boden klebt.
***
which you'll adhere to one of the 2 cardstock pieces for the bottom.


Von unten klebt Ihr dann das zweite Bodenteil an.
***
Now adhere the second bottom to the other side.


Den Deckel schneidet Ihr aus und klebt ihn zusammen.
***
Cut the lid and glue it.


Das innere Körbchen wird an der Klebelasche zusammengeklebt.
***
Glue the cardstock at the lid for the inner basket.


Schneidet Euch ein Stück Cardstock 1cm x 8cm und falzt es jeweils bei 1,5 cm an beiden Seiten.
***
Cut a little piece of cardstock in 1cm x 8cm and score it on both sides a 1,5 cm.


Dieses Stück wird am Körbchen unten festgeklebt, um es in die Box zu kleben.
***
Adhere this piece to the bottom of your basket to adhere it to your box.


Die 6 quadratischen Stücke Cardstock werden nun mit Papier überzogen.
***
Cover the 6 cardstock squares with patterned papers.


Von hinten wird ein Band geklebt, damit vorn etwas Süßes angebunden werden kann.
***
Add a ribbon to the back of covered cardstock to add some sweets to your box.
 

Nun werden die Quadrate festgeklebt und das Osternest kann befüllt werden.
***
Adhere the squares and add your treats into your box.


Ich hoffe Ihr habt Lust auf ein Ostern in der Box!
***
I hope you enjoy Easter in the box!

Liebe Grüße
***
Greetings

Tanja


Und hier ist Ostern in der Box vom Team:

***
And here is Easter in the box from the team:


Read more...

  © Blogger template Writer's Blog by Ourblogtemplates.com 2008

Back to TOP