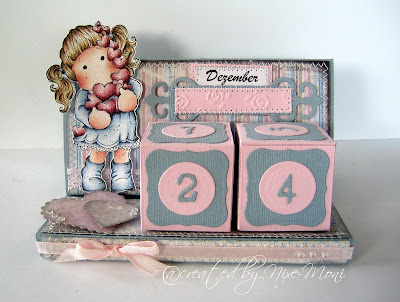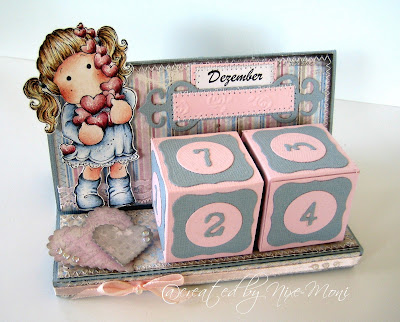
Würfelkalender / Cube Calendar
Samstag, 24. Dezember 2011
Das neue Jahr steht vor der Tür und das ist der perfekte Zeitpunkt, einen Kalender zu basteln (oder zwei oder drei). Dieser Kalender ist sogar immerwährend und passt auf jeden Schreibtisch.
***
The new year is just around the corner and what better moment than this to craft a calendar (or two or three)? This calendar is even better than your average calendar, because it's everlasting and fits even the smallest desk.
The new year is just around the corner and what better moment than this to craft a calendar (or two or three)? This calendar is even better than your average calendar, because it's everlasting and fits even the smallest desk.

Ihr braucht:
2x Cardstock 17cm x 14cm
1x Cardstock 30,5cm x 11,5cm (wer nicht so viel Platz neben den Würfeln für Deko möchte oder braucht, kann die Breite variieren. Mindestmaß ist allerdings 9,5cm, schmaler dürft ihr nicht werden)
1x Cardstock 6cm x 1,5cm
1x Cardstock 7cm x 2cm
Falzbein
Bastelmesser
Schere
Klebeband
Monatskärtchen
2x Cardstock 17cm x 14cm
1x Cardstock 30,5cm x 11,5cm (wer nicht so viel Platz neben den Würfeln für Deko möchte oder braucht, kann die Breite variieren. Mindestmaß ist allerdings 9,5cm, schmaler dürft ihr nicht werden)
1x Cardstock 6cm x 1,5cm
1x Cardstock 7cm x 2cm
Falzbein
Bastelmesser
Schere
Klebeband
Monatskärtchen
***
You'll need:
2pc of cardstock 17cm x 14cm (or 6 1/2'' x 5 1/2'')
1pc of cardstock 30,5cm x 11,5cm (or 12'' x 4 1/2'') Note: If you don't want or need this much or more space to decorate, you can change the width from 4 1/2'' to mostly anything you like, just don't get smaller than 3 3/4''.
1pc of cardstock 6cm x 1,5cm (or 2 3/8'' x 5/8'')
1pc of cardstock 7cm x 2cm (or 3 3/8'' x 1'')
Bone folder
Cutter
Scissors
Double sided sticky tape
The month cards
2pc of cardstock 17cm x 14cm (or 6 1/2'' x 5 1/2'')
1pc of cardstock 30,5cm x 11,5cm (or 12'' x 4 1/2'') Note: If you don't want or need this much or more space to decorate, you can change the width from 4 1/2'' to mostly anything you like, just don't get smaller than 3 3/4''.
1pc of cardstock 6cm x 1,5cm (or 2 3/8'' x 5/8'')
1pc of cardstock 7cm x 2cm (or 3 3/8'' x 1'')
Bone folder
Cutter
Scissors
Double sided sticky tape
The month cards

Für die Würfel braucht ihr die beiden 17cm x 14cm Stücke Cardstock. An der langen Seite falzt ihr bei 4, 8, 12 und 16cm. Dann müsst ihr den Cardstock um 90° drehen und bei 1, 5, 9 und 13 cm falzen.
Schneidet die schraffierten Parts weg, aber lasst den grünen Part stehen (ca. 1cm, aber da müsst ihr nicht übergenau sein, das wird ja eine Klebelasche und ist später nicht mehr zu sehen).
***Schneidet die schraffierten Parts weg, aber lasst den grünen Part stehen (ca. 1cm, aber da müsst ihr nicht übergenau sein, das wird ja eine Klebelasche und ist später nicht mehr zu sehen).
For the cubes you need your two pieces of cardstock cut at 17cm x 14cm (6 1/2'' x 5 1/2''). Score it at the longer side at 4, 8, 12 and 16cm (1 1/2'', 3'', 4 1/2'' and 6'') then turn it around 90° and score again at 1, 5, 9 and 13cm (1/2'', 2'', 3 1/2'' and 5'').
Cut away the shaded parts, but don't cut the green part (leave about 1cm or 1/2'', you don't have to be exact, it's not going to be visible later on).
Cut away the shaded parts, but don't cut the green part (leave about 1cm or 1/2'', you don't have to be exact, it's not going to be visible later on).

Schneidet an den Klebelaschen noch die Ecken ab. Wenn ihr eure Würfel bestempeln wollt, dann müsst ihr das jetzt tun.
***
Cut away the edges of the flaps. If you want to stamp a pattern on your cubes, you'll have to do it now.

Faltet einmal alle Falzlinien durch und zieht die Falzlinien noch einmal gut mit dem Falzbein nach. Klebt dann den Würfel zusammen.
***
Fold all your lines and use your bone folder to give them a good crisp fold. After that just glue your cube together.

So sieht euer fertiger Würfel dann aus. Das ganze macht ihr mit dem zweiten noch einmal und dann geht es weiter zum Standfuß des Kalenders.
***
Your finished cube looks like this. Repeat that again for your second cube and then we'll move over to the stand.

Nehmt euch das große Stück Cardstock und falzt bei 2,5cm, 7cm, 8,2cm, 15cm, 21,5cm und 28,5cm.
***Take the biggest piece of cardstock and score at 1'', 2 3/4'', 3 1/4'', 6'', 8 1/2'' and 11 1/4''.

Fangt an der 2,5cm Falz an und faltet die ersten 3 Falze. Dann klebt ihr den ersten Teil des Standfußes fest. Wie auf dem Bild gezeigt, sollte dabei die Kante genau auf die 15cm Falz treffen.
***
Fold the first 3 score lines beginning at the 1'' score line. Then glue the first part of the stand down. Like shown in the picture the edge should meet the 6'' score line exactly.
***
Fold the first 3 score lines beginning at the 1'' score line. Then glue the first part of the stand down. Like shown in the picture the edge should meet the 6'' score line exactly.

Dann faltet ihr auch die anderen Falzen und euer Standfuß sieht etwa so aus.
***
Now fold the other 3 score lines. Your stand should now look like this.
***
Now fold the other 3 score lines. Your stand should now look like this.

Jetzt klebt ihr die Rückseite so fest, dass ihr genau an die 2,5cm Linie anstoßt.
***
Now stick down the backside of your stand and let both parts meet at the 1'' score line.

Die Monate für euren Kalender sind austauschbare Schildchen, für die ihr eine kleiner Halterung braucht. Platziert eure Würfel ungefähr so wie sie später liegen sollen. Ich möchte rechts etwas mehr dekorieren als links, darum sind meine Würfel ein wenig linkslastig.
Jetzt braucht ihr euer Stück Cardstock in der Größe 6cm x 1,5cm und möglichst ein sehr dünnes Klebeband oder etwas flüssigen Kleber. Ich habe 3mm breites Klebeband genommen. Bringt den Kleber auf der äußersten Kante des Cardstocks auf und klebt ihn so über die Würfel, wie es euch am besten gefällt. Ich habe versucht, möglichst die Mitte zu treffen.
***
For your months you need a little pocket. Place your cubes where you would like to position them later. I wanted to put a little more decoration on the right side, so I moved mine slightly more to the left.
Now you need the small 6cm x 1,5cm(2 3/8'' x 5/8'') piece of cardstock. Put some narrow sticky tape (I used 3mm) or some liquid glue on the edges of the cardstock and place it where you think it fits your calendar best. I tried for the middle.
Jetzt braucht ihr euer Stück Cardstock in der Größe 6cm x 1,5cm und möglichst ein sehr dünnes Klebeband oder etwas flüssigen Kleber. Ich habe 3mm breites Klebeband genommen. Bringt den Kleber auf der äußersten Kante des Cardstocks auf und klebt ihn so über die Würfel, wie es euch am besten gefällt. Ich habe versucht, möglichst die Mitte zu treffen.
***
For your months you need a little pocket. Place your cubes where you would like to position them later. I wanted to put a little more decoration on the right side, so I moved mine slightly more to the left.
Now you need the small 6cm x 1,5cm(2 3/8'' x 5/8'') piece of cardstock. Put some narrow sticky tape (I used 3mm) or some liquid glue on the edges of the cardstock and place it where you think it fits your calendar best. I tried for the middle.
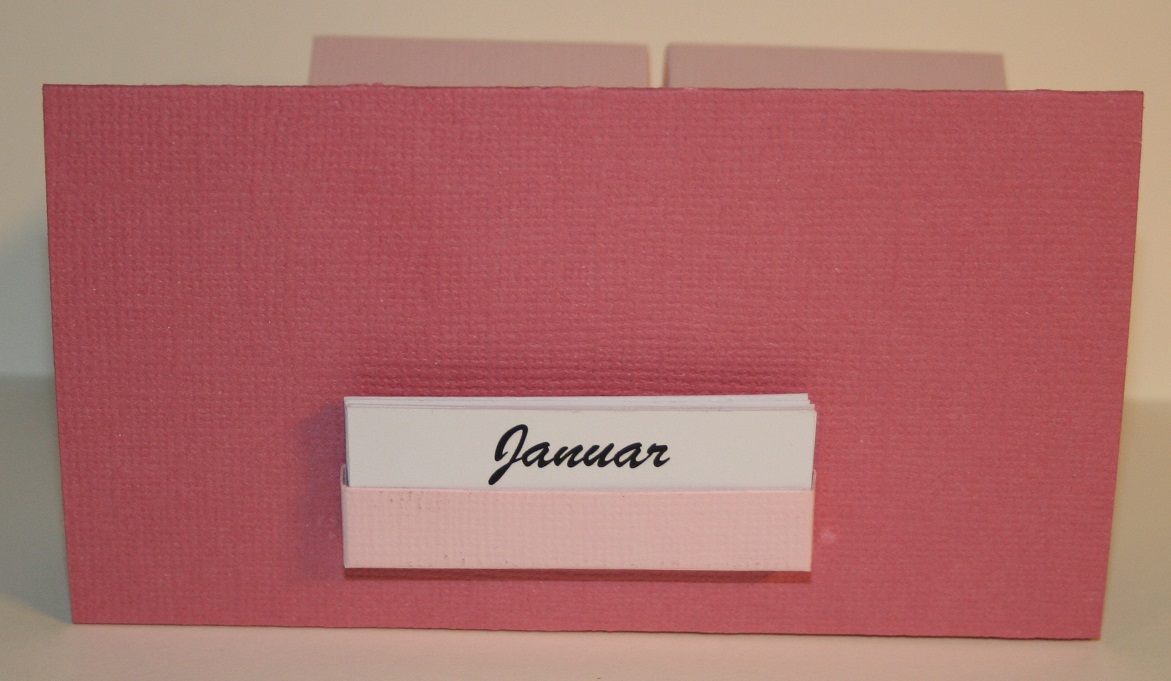
Die Monatsschildchen, die gerade nicht gebraucht werden, werden in einer kleinen Tasche auf der Rückseite des Kalenders aufbewahrt. Dafür braucht ihr euer letztes Stück Cardstock und falzt es auf der langen Seite bei 0,5cm, 1cm, 6cm und 6,5cm. Dann dreht das ganze um 90° und falzt wieder bei 0,5 und 1cm.
Schneidet die Ecken raus, wie auf dem Bild zu sehen und klebt das Täschchen zusammen.
***
For the months you don't use there will be a little pocket on the back of the calendar. For this pocket you'll need your last piece of cardstock. Score it on the long side at 1/4'' and 1/2'', turn it by 180°, score again at 1/4'' and 1/2'', another turn, this time by 90° and again fold at 1/4'' and 1/2''.
Cut away the edges and glue the pocket together.
Schneidet die Ecken raus, wie auf dem Bild zu sehen und klebt das Täschchen zusammen.
***
For the months you don't use there will be a little pocket on the back of the calendar. For this pocket you'll need your last piece of cardstock. Score it on the long side at 1/4'' and 1/2'', turn it by 180°, score again at 1/4'' and 1/2'', another turn, this time by 90° and again fold at 1/4'' and 1/2''.
Cut away the edges and glue the pocket together.


Jetzt könnt ihr die kleine Tasche auf der Rückseite des Kalenders festkleben. Ich hab mich wieder an der Mitte versucht, aber ihr könnt das natürlich so machen, wie es euch am besten gefällt.
***
Now glue your pocket on the back of your calendar. I once again aimed for the middle, but of course you can just put it where ever you want.
***
Now glue your pocket on the back of your calendar. I once again aimed for the middle, but of course you can just put it where ever you want.

Jetzt fehlen nur noch die Zahlen für eure Würfel. Auf den einen Würfel kommen die Zahlen 0, 1, 2, 3, 4, 5. Auf den zweiten Würfel die Zahlen 6, 7, 8, 0, 1, 2. Die 6 hat hier auch die Doppelfunktion als 9.
***
Now all your are missing are the numbers on your cubes. For the first cube you need the numbers 0, 1, 2, 3, 4, 5. For the second cube you need the 6, 7, 8, 0, 1, 2. The 6 also is your 9.
Hugs,
Heike


Read more...
***
Now all your are missing are the numbers on your cubes. For the first cube you need the numbers 0, 1, 2, 3, 4, 5. For the second cube you need the 6, 7, 8, 0, 1, 2. The 6 also is your 9.
Ich hoffe, euch hat dieses Tutorial gefallen und ihr probiert es mal aus. Ich bin schon sehr gespannt, eure Kalender zu sehen :o)
***
I hope you enjoyed this tutorial and will give it a try. I'm really looking forward to seeing your calendars :o)
***
I hope you enjoyed this tutorial and will give it a try. I'm really looking forward to seeing your calendars :o)
Hugs,
Heike
Und hier sind die Kalender vom Team.
***
And here are the calendars from the team.