


Sommerlaterne - summer lantern
Samstag, 16. Juli 2011
Endlich ist wieder Samstag, d. h. Zeit für eine neue Ausgabe vom Stempeleinmaleins. Wir haben heute die liebe Bine von Bines Tüttelkram zu Gast und sie hat eine Anleitung für eine wunderschöne Laterne mitgebracht.
***
Finally it's Saturday again and time for a new issue of Stempeleinmaleins. We have the lovely Bine from Bines Tüttelkram as our guest today and she wrote a tutorial for a wonderful lantern.

Ihr braucht:
Papierschneider
Schneidematte
Schere
Lineal
Falzbein
Bleistift
Cuttermesser
Cuttlebug (aber kein Muss)
Cardstock (gerne etwas dicker) in der gewünschten Farbe
Folie
Dekokrams
***You need:
cutting tool
cutting mat
scissors
ruler
bonefolder
pencil
cutter
Cuttlebug (no need if you don't want to emboss the acetate)
cardstock (if possible a thick one) in the color you want
acetate
decorations
 Zuerst schneidet Ihr Euch aus dem Cardstock/Karton 2 gleiche Teile aus. Die beiden Quadrate sind dabei 10 x 10 cm und dann kommen ganz am Rand und unten noch die Klebefalze dazu:
Cut two pieces in the same size out of your cardstock. The squares are 3.94" x 3.94" and then you still need a lap for the glue at the bottom.
Gesamtlänge = 21 cm & 10 cm + 10 cm + 1 cm Klebefalz (am einfachsten ist es, ein A5-Blatt quer zu nehmen - das misst nämlich genau 21 cm, dann müsst Ihr nicht so viel schnippeln)
***The total length you need is 8.27" & 3.94" + 3.94" + 0.39" for the glue.

Vom Rand der beiden Quadrate jetzt rundrum 1,5 cm abmessen und mit einem Cutter die Fenster ausschneiden. Danach kommt doppelseitiges Klebeband rund um die Fensteröffnung. Wer mag, kann selbstverständlich auch Kleber benutzen, aber das war mir beim letzten Mal zuviel Geklecker ;-)
***
Take 0.59" as the edge of both squares and cut the window out with your cutter. After that add douplesided tape around the window openings. If you want you can also use fluid glue but I won't do it again after it was a mess last time ;-)

Als Nächstes schneidet Ihr Euch die Fenster aus Folie zurecht. Diese messen 9,5 x 9,5 cm, damit noch ein bisschen Platz zum Rand bleibt, sonst lässt sich das Ganze am Ende so schlecht falten.
***
Then cut the windows from acetate. They are 3.74" x 3.74". A bit bigger than the openings to have an edge for the glue.
Then cut the windows from acetate. They are 3.74" x 3.74". A bit bigger than the openings to have an edge for the glue.
An dieser Stelle kommt die Cuttlebug zum Einsatz. Da hab ich meine Folie nämlich durchgeleiert, damit sie ein schönes Schnörkelmuster bekommt. Das ist aber kein Muss - "nackige" Fenster sind genauso schick :-)
***
Now use your Cuttlebug to emboss the acetate. You don't need to but it looks wonderful with a little pattern on it ;-)
***
Now use your Cuttlebug to emboss the acetate. You don't need to but it looks wonderful with a little pattern on it ;-)

Nun die Folie in die Fenster kleben.
***
Now adhere the acetate behind the windows.
***
Now adhere the acetate behind the windows.

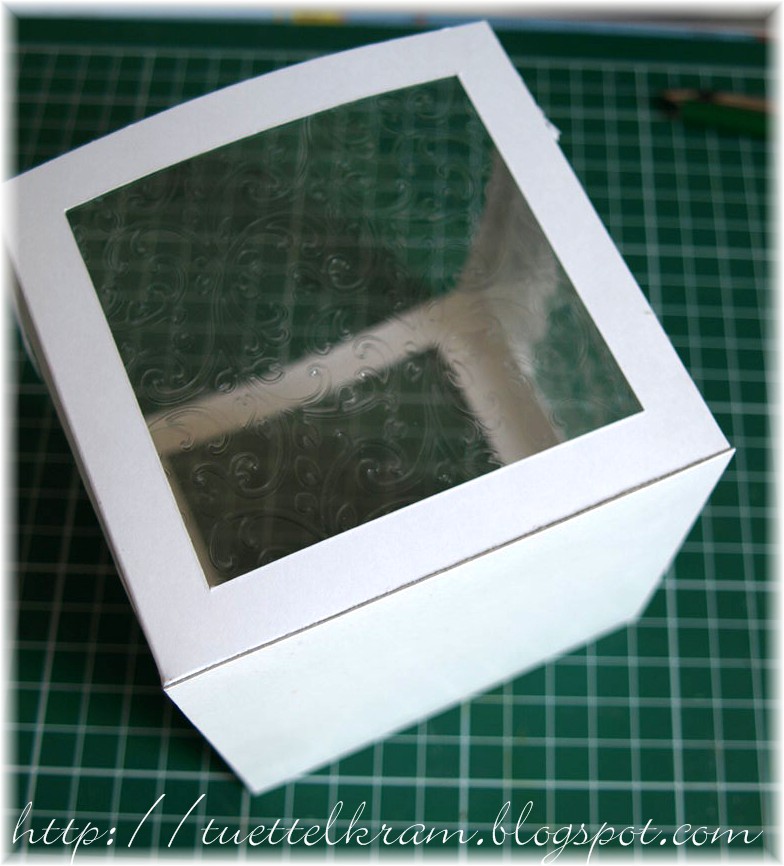
Jetzt müsst Ihr nun noch die Mittelkante und die Klebefalze falten ...
***
Fold both parts between the single squares and all glue laps with the bone folder ...

... und die beiden Teile zusammenkleben:
***
... and glue the lantern together.
... and glue the lantern together.
Jetzt wird von unten der Boden gegengeklebt: ein Stück Pappe 10 x 10 cm. Und auch von Innen nochmal ein Stück ca. 9,8 x 9,8 cm, um die Klebefalze abzudecken.
***
Now you have to add the bottom part. You need a piece of cardstock 3.94" x 3.94". Glue it to the bottom (glue laps) of your lantern. You also need another piece of cardstock 3.86" x 3.86" for the inside to cover the glue laps.


Dann nur noch nach Belieben dekorieren und schon seid Ihr fertig :-)
***
Now decorate your lantern like you want and ready you are :-)
Now decorate your lantern like you want and ready you are :-)

In die Mitte kommt ein kleiner Glasteelichthalter (jibbet beim Schwedischen Möbelhaus für billiges Geld) - den kann man festkleben oder auch nicht :-)
***
Put a little glass candle holder into the middle of the lantern (you can e. g. get some at IKEA) :-)
Put a little glass candle holder into the middle of the lantern (you can e. g. get some at IKEA) :-)

Natürlich hab ich abends gleich mal probe-gelichtelt. :-)
***
Of course I had to make a light test in the evening :-)
Of course I had to make a light test in the evening :-)
Lieben Dank fürs Reinschauen und noch ein schönes Wochenende!
***
Thanks for reading and I wish you all a wonderful weekend!
Thanks for reading and I wish you all a wonderful weekend!
Hier sind die Laternen vom Team:
***
Here are the lanterns from the team:
Here are the lanterns from the team:
Bine (GD)


