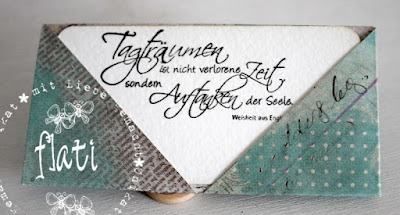
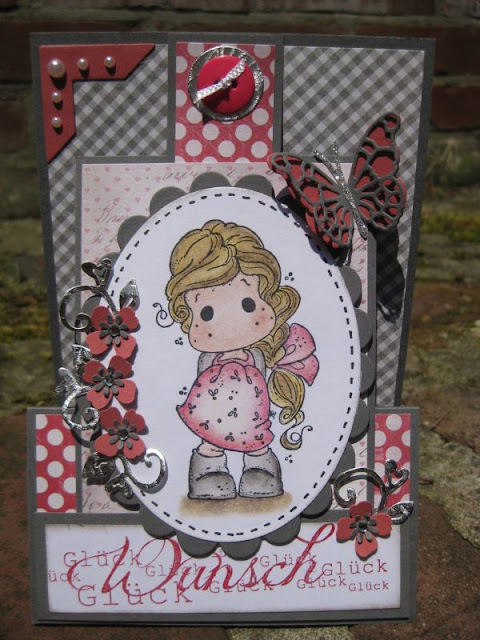
Es ist Samstag und somit wieder Zeit für eine neue Ausgabe vom Stempeleinmaleins. Heute haben wir wieder die liebe
Birgit (Biba) zu Gast und sie hat uns ihre Standkarte mitgebracht.
***
It's Saturday again which means time for a new issue of Stempeleinmaleins. Today we have the lovely Birgit (Biba) as our guest again and she has a tutorial for her standing z-fold card for you.
Ihr braucht:
- Cardstock 11 x 27 cm, 12 x 8 cm, 4 x 12 cm
- Designpapier 10,5 x 14,5 cm, 10,5 x 5,5 cm, 11,5 x 7,5 cm, 3,5 x 11,5 cm, 10,5 x 14,5 cm (Rückseite)
- Falzbein/Falzbrett
- Knopf
- Bändchen
- Stempelmotiv
- Dekoration
***
You need:
- cardstock 11 x 27 cm, 12 x 8 cm, 4 x 12 cm
- pattern paper 10,5 x 14,5 cm, 10,5 x 5,5 cm, 11,5 x 7,5 cm, 3,5 x 11,5 cm, 10,5 x 14,5 cm (backside)
- bone folder/score board
- button
- ribbon
- stamped image
- embellishments
Als erstes benötigt man ein Stück Cardstock in 11 cm x 27 cm. Die lange Seite wird bei 6 cm und 12 cm gefalzt, so dass eine Treppe entsteht.
***
First you need a piece of cardstock in the size 11 x 27 cm. Fold at the long side at 6 cm and 12 cm so that you get the z-fold.
Als nächstes brauchen wir zwei Stücke Designpapier in 10,5 cm x 14,5 cm und 10,5 cm x 5,5 cm. Die Papierstücke werden dann auf den Cardstock geklebt.
***
Then you need two pieces of pattern paper in the sizes 10,5 x 14,5 cm and 10,5 x 5,5 cm. Add both pieces to the z-folded cardstock.
Einmal ist die Treppe auseinander gezogen und oben zusammen gedrückt.
***
This is the z-fold with pattern paper.
Nun brauchen wir Cardstock in 12 cm x 8 cm und Designpapier in 11,5 cm x 7,5 cm.
***
Now you need a piece of cardstock 12 x 8 cm and pattern paper 11,5 x 7,5 cm.
Achtung hier nicht die beiden Teile einfach aufeinander kleben! Oben muss eine Lücke bleiben wo kein Kleber hinkommt, damit man da noch was einschieben kann!
***
Don't glue both parts together at full space! In the top you need a space without double sided tape because there you still have to stick in another piece of the card!
Nun brauchen wir noch einen Streifen Cardstock in 4 cm x 12 cm und Designpapier in 3,5 cm x 11,5 cm, das kann dann auch direkt aufeinander geklebt werden.
***
You need another piece of cardstock in the size 4 x 12 cm and pattern paper to mat in 3,5 x 11,5 cm. Adhere these parts together.
Jetzt hat man diese beiden Teile und kann den schmalen Streifen in der Mitte zwischen dem großeren Stück Cardstock und Designpapier zwischenschieben! (Sorry das Bild ist etwas unscharf)
***
Now you have both parts and stick the small scrap into the middle of the big piece of cardstock and pattern paper which are open at the top. (Sorry for the blurry picture)
Als nächstes schaut man noch nach einem Stempelmotiv, einem Knopf und einem Text den man auf der Karte haben möchte.
Bevor ich alles festklebe lege ich erstmal das Motiv und Spruch lose auf den Mittelteil. Gefällt mir was ich sehe dann fange ich an alles festzukleben.
***
You need an image, a button and a sentiment to decorate your card. Before I adhere everything together I add all the parts together without glueing. If I like the design I adhere all the parts together.
Jetzt klebe ich das Mittelteil auf dem Unterteil der Treppe fest... von unten ist nur so 0,5 - 1,0 cm Platz... also nicht zu hoch ankleben!
***
Now adhere the middle part to the upper z-fold. You only have 0,5 - 1,0 cm from the buttom, don't adhere it higher!
Ich ziehe den Cardstockstreifen bis an die obere Kante der Karte, lege einen Knopf auf und mache zwei Punkte.
***
Pull the small scrap to the upper edge, add your button and mark the places where you need to make the holes.
Genau an diese Stellen mache ich nun Löcher in den Streifen Cardstock und auch in die Rückwand der Karte.
***
Add the holes through your scrap of cardstock and pattern paper and also through the card's backside.
Danach ziehe ich ein Bändchen durch den Knopf, den Streifen Cardstock und die Kartenrückwand. Oben drauf habe ich zwei Knoten gemacht und fertig ist die Karte.
***
After that add a ribbon and tie it with a knot or two.
Auf die Rückseite habe ich auch Designpapier geklebt, das verdeckt dann die Löcher und das Bändchen und man kann z. B. noch einen kleinen Gruß darauf schreiben.
***
If you want you can adhere pattern paper to the card's backside. If covers the holes and ribbon and you can add a little greeting.
Das Designpapiermaß für die Rückseite ist 10,5 cm x 14,5 cm.
Anstatt des Bändchens mit dem Knopf kann man auch sehr gut ein Brad benutzen!
So nun wünsche ich euch viel Spaß beim Nachbasteln.
***
The pattern paper for the backside is 10,5 x 14,5 cm. Instead of the button you could also use a brad! Have fun while crafting.
Eure Birgit
Und hier sind die Standkarten vom Team:
***
And here are the standing z-fold cards from the team:
Read more...


