Der Herbst und damit die Schnupfenzeit stehen vor der Tür. Darum habe ich (
Kathrin) heute ein Tutorial für eine Arzttasche für Euch. Die kann mit Süßem gefüllt werden und hilft so vielleicht einem Kranken ein Lächeln auf die Lippen zu zaubern.
Fall is close and that means that also the time of caughing and sneezing will soon be here as well. So I (Kathrin) have made a tutorial for a doctor's bag. It can be filled with sweets and may bring a smile on a sick person's face.
***
- ein Stück Cardstock 18,5 x 30 cm
- ein Stück Cardstock 16,1 x 17,4 cm
- Cardstock, ca. 30 x 30 cm, für die Außenteile der Tasche
- kleinere Cardstockstücke für die Henkel und Verschlussleisten
- etwas Klettband oder einen Magneten
- Schere, Kleber, Falzbein
- one piece of cardstock measuring 18,5 x 30 cm
- one piece of cardstock measuring 16,1 x 17,4 cm
- cardstock, about 30 x 30 cm, for the outer sides of the bag
- some smaller pieces of cardstock for the handles and closuring blends
- scissors, glue, bone folder
Ich habe auf den folgenden Bildern die Falzungen für Euch mit schwarzem Stift nachgemalt, da ich die Tasche selbst aus schwarzem Cardstock gemacht habe und auf dem hätte man die Falzlinien nicht wirklich erkannt. Also wundert euch nicht, wenn die Farben irgendwann wechseln...
Falzt das größere Stück Cardstock an der kurzen Seite bei 3,5 cm, 7 cm, 11,5 cm und 15 cm. Dreht es dann um 90 Grad und falzt die längere Seite bei 3,5 cm, 7 cm, 23 und 26,5 cm.
I re-drew the scoring lines with a black pen on white paper since I used black cardstock for my bag and it would have been hard to show them. So don't wonder when the colors change inbetween...
Score the short side of the bigger piece of cardstock at 3,5 cm, 7 cm, 11,5 cm and 15 cm. Then turn it around 90° and score at 3,5 cm, 7 cm, 23cm and 26,5 cm.
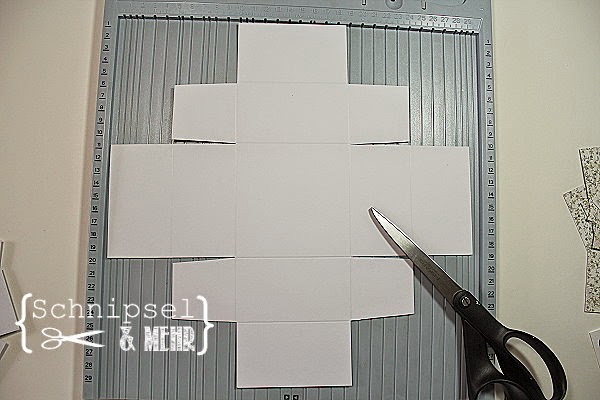
Schneidet nun alle mit X markierten Quadrate weg und macht kleine Einschnitte an den gestrichelten Falzlinien. Wenn Ihr wollt, könnt Ihr auch die Klebelaschen noch etwas anschrägen.
Nun sollte das Stück Cardstock so aussehen (ich habe mir eine Schneiddatei für meine Silhouette Cameo gemacht, darum sehen meine Falzlinien anders aus):
Cut off all squares that are marked with an X and cut along the scoring lines that are marked on the picture above. If you want to, you can also taper the pieces that the glue goes on.
Now your cardstock should look like this (I made myself a pattern for my Silhouette Cameo to cut it, that's why my scoring lines look different):
Nun ist das 17,4 x 16,1 cm große Stück Cardstock an der Reihe.
***
Now take the piece of cardstock measuring 17,4 x 16,1 cm.
Falzt die lange Seite bei 3,6 cm, 8,2 cm, 11,8 cm und 16,4 cm und Euer Carddstock sieht so aus (der 1 cm breite Streifen ist die Klebelasche, die Ihr ebenfalls wieder anschrägen könnt):
Score the long side of your paper at 3,6 cm, 8,2 cm, 11,8 cm and 16,4 cm and you'll end up with this (the 1 cm wide strip is for glueing it together and you might want to taper this as well):
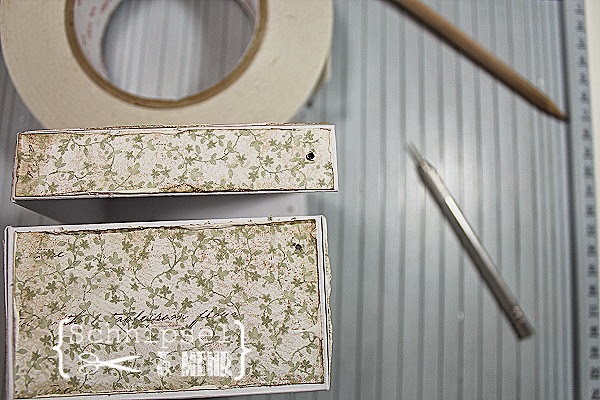
Klebt dann die Box und die Hülle zusammen. Ich denke, das könnt Ihr alle auch ohne Anleitung.
Then glue together the box at the outer part. I don't think I need to explain that to you.
Ladet Euch
HIER die Vorlage für die Außenteile der Tasche herunter und druckt sie aus. Entweder auf normalem Druckerpapier oder direkt auf Euren Cardstock, ganz wie Ihr möchtet. Stellt die Druckeinstellung unbedingt auf 100 %, damit die Vorlage auch in der richtigen Größe ausgedruckt wird.
Download the bag pattern
HERE and print it out - on regular printer paper or directly onto your cardstock, however you want to. Put your printer settings to 100 % to make sure it gets printed the right size.
Schneidet nun die Teile aus - Ihr braucht 2 x die Außenseite der Tasche, 4 x die Verschlussleiste und 2 x den Henkel.
Cut out the different pieces from Cardstock or designer's paper - you'll need 2 of the outer bag parts, 4 of the closuring strips and 2 of the handles.
Zuerst kommen nun die Außenteile auf die Box, darauf innen und außen die Verschlussleisten und darauf die Henkel der Tasche. Ich habe alles mit verschiedenen Tinten gewischt und auf die Henkel noch Nähte aufgemalt.
Klebt auf die inneren Verschlussleisten etwas Klettverschluss oder Magnete, damit die Tasche geschlossen bleibt.
Now glue the outer bag parts on the box, on top of these - on the inside and outside - the closuring strips and on top of these the handles. I used different inks to ink up the edges and drew some stitches on the handles.
Glue some Velcro or magnets on the inner closuring strips to keep the bag closed.
Und nun gehts ans Verzieren:
***
And now it's time for decoration:
Die Box in dieser Anleitung ist für 2 Twix XL ausgelegt, Ihr könnt aber die Boxgröße problemlos ändern. Passt den unteren Teil der Taschenteile an die Höhe Eurer Box an und verlängert sie dann unterhalb der Verschlussleisten nach oben. Die Größenveränderung in der Breite ist ja ganz einfach. Ihr solltet den oberen Teil der Taschenteile nur nicht niedriger machen, da sie sonst nicht mehr über der Box geschlossen werden können (außer natürlich Ihr macht eine ganz schmale, niedrige Box).
The box in this tutorial is made to fit in two Twix XL, but of course it isn't a problem to change it in size. Make the bottom part of your bag parts fit the height of your box and make it higher directly underneath the closuring strips. Changing them in width is easy and don't needs any explanations. Just make sure you don't make the outer bag parts any lower or they won't close well over the box (or they only will if you make a very small and low box).
Und hier habe ich noch eine andere, etwas größere Tasche, die ich vor einiger Zeit gemacht habe:
***
And here's another, bigger bag that I made some time ago:
Ich hoffe, Ihr bleibt alle gesund!
***
Hope you're all staying well!
Liebe Grüße, hugs,
Und hier sind noch die Taschen vom Rest des Teams:
***
And these are the bags my teamies made:
Bianca
Read more...


