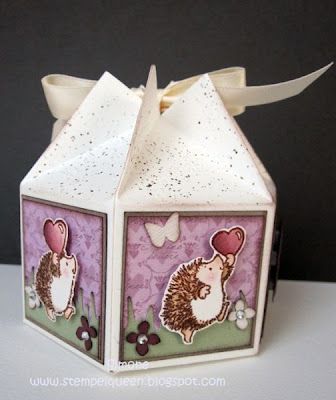
Endlich ist es wieder Samstag und wir haben heute die liebe
Katrin (KayBeScraps) zu Gast. Sie hat eine Anleitung für eine total süße 6eck Box geschrieben, die sie heute mit uns teilt.
***
Finally it's Saturday again and we have the lovely Katrin (KayBeScraps) as our guest. She has written a tutorial for a cute six-sided box which she is sharing with us today.
"Die Idee der Box ist nicht von mir. Die gibt es sicher schon oft im Internet zu sehen. Dieses ist nur ein Tutorial, wie ich diese Box hergestellt habe.
***
The idea to make this box is not mine. I think you've seen some of these boxes on the internet before. This tutorial shows how I made my box.
Als erstes habe ich euch eine Skizze gezeichnet. Mit Klick auf's Bild wirds größer.
***
First I've drawn a sketch for you. Click on the picture for a larger view.
Als erstes braucht ihr Cardstock oder Tonkarton in 31 cm x 15 cm... diesen falzt ihr an der langen Seite bei 5 - 10 - 15 - 20 - 25 und 30 cm;
***
First of all you need a piece of cardstock (12.2" by 5.91"). You have to fold it at 1.97" - 3.94" - 5,91" - 7,87" - 9,84" and 11.81".
Dann legt ihr es mit der kurzen Seite nach oben und falzt es bei 5 und 10 cm.
***
Lay it with the short side up and fold it at 1.97" and 3.94".
Dann schneidet ihr es unten so ein, wie auf dem Bild, das ist nachher der Boden. Ihr müsst es nicht so abschrägen, ich habs einfach gemacht ;-) Und schneidet das kleine Stück (unter der Schneidelasche) rechts mit ab.
***
Then cut it at the lower side as you see it on the picture - this will be the bottom. You may cut it as diagonally as I did, but you don't have to - it's just an idea ;-) Cut off the little piece on the right side (under the glueing flap), too.
Dann legt ihr euer Papier wieder an den Scorpal und verrutscht es auf ½ cm.
***
Then put the cardstock on your scorpal, move it to 0.2" and
und markiert euch mit dem Falzstift oder Bleistift die Stellen bei 3 - 8 - 13 - 18 - 23 und 28 cm.
***
8" - 3.15" - 5.12" - 7,09" - 9.06" and 11.02".
Nun zieht mit dem Falzstift die Linien, wie auf dem Bild zu sehen.
***
Draw lines with the scorepal as you can see on the picture.
Dann müsst ihr die unteren Teile mit Klebestreifen versehen (ihr müsst schauen, wie es bei euch hinkommt) und klebt es dann zusammen..
***
Then put little pieces of tape on the lower parts and glue them together.
Ein bissel falten und nun müsste es so aussehen.
***
It should look like this (maybe you have to bend the parts back and forth).
Dann müssen noch zwei Löcher für die Schleife hinein.
***
You still have to make two holes for the ribbon.
Und nun könnt ihr eure 6eck Box verzieren. Meine sieht nun so aus.. mit der süßen LeLo Schnecke.
***
Now you can decorate your six-sided box as you like. I put an LeLo snail on it.
Ich hoffe, das Tutorial ist verständlich.. wenn noch Fragen sind, einfach melden.. und ich würde mich natürlich freuen, wenn ihr die Box nachbastelt und mir den Link zu eurem Werk hier verlinkt.
***
I hope the tutorial is easy to understand. If there are questions don't hesitate to send me an email. I'd be happy if you'd make those boxes and if you would send me links to your pages or pictures of your creations.
Katrin aka KayBeScraps"
Und hier sind die 6eck Boxen vom Team:
***
And here are the six-sided boxes from the team:


16 Kommentare:
Wow, was für eine süße Verpackung!!! Total knuffig! Danke für den tollen Workshop!
LG Petsy
ja, ja, DAS ist meine Cheffin.. *gg*
einfach toll..und absolut verständlich!!!
liebe Grüsse Barbara
Was für eine tolle Idee!!
Vielen herzlichen Dank dafür, dass ihr diese Seite betreibt und so viele tolle Ideen hier reinstellt.
Ganz dickes Lob an euch alle,
liebe Grüsse
Sandra
Hallo liebe SEME-Team...
...ich bin sprachlos was ihr für tollen Ideen habt....Klasse..Einsame Spitze..wirklich...
Ich habe diese Box auch nachgebastelt(endlich habe ich es geschafft)
Ich weis nicht wie das geht mit den link...aber sehen kann man die hier
http://lauracreativ.blogspot.de/2012/05/6eck-box-six-sided-box.html
Mach weiter so....Ihr seid ein super Team...
GGGVLG,Laura
Superrrr!!!
Pozdrawiam
ollart
Hallo, das ist ja eine wunderschöne Box, de sehen ja alle super aus.
Vielen Dank für die tolle Anleitung.
LG Inge
Oh, da sind ja wundervolle Werke entstanden....
LG Ilse (thera)
Super!
Hab sie gleich nachgearbeitet:-)
LG Martina
Hallo,
ich bin einfach nur begeistert, ich finde Eure Arbeiten wie immer wunderschön.
Aber diese Box ist wie die Cupcake Box ein Knaller.
LG aus Berlin
Habe sie Heute auch gemacht. Ganz einfach und tolle Wirkung.
Danke für die Vorlage und Beispiele.
Lieben Gruss Michelle
Hallo
die sind ja sooo sweet oder auf gut schweizerdeutsch soo herzig.
diese Böxli motivieren gleich zum Basteln.
noch kurz vor Muttertag.
liebe Grüsse
gaby
Ich habs auch gleich probiert, bei dieser tollen Anletung war das kein Problem, super Arbeit, die ihr hier leistet.
Hier ist meine Box zu sehen:
http://katriesbastelseiten.blogspot.de/2012/05/six-sided-box.html#links
LG Karin
I love this box, it is so easy but looks really great. I did have a bit of trouble fixing the base so that the sides were even, but I'm still really pleased with the result. Thank you for another great tutorial. Here's my creation".
Annette
xx
Oh this is just fantastic! What a fabulous tutorial, and such gorgeous work from the whole team, loving it. Hugs Sxx
Really cute. Thanks for the pattern and the description.
hermosa caja y los trabajos de las chicas bellísimos, gracias por la inspiración y el tutorial, un abrazo desde México!!!
Kommentar veröffentlichen